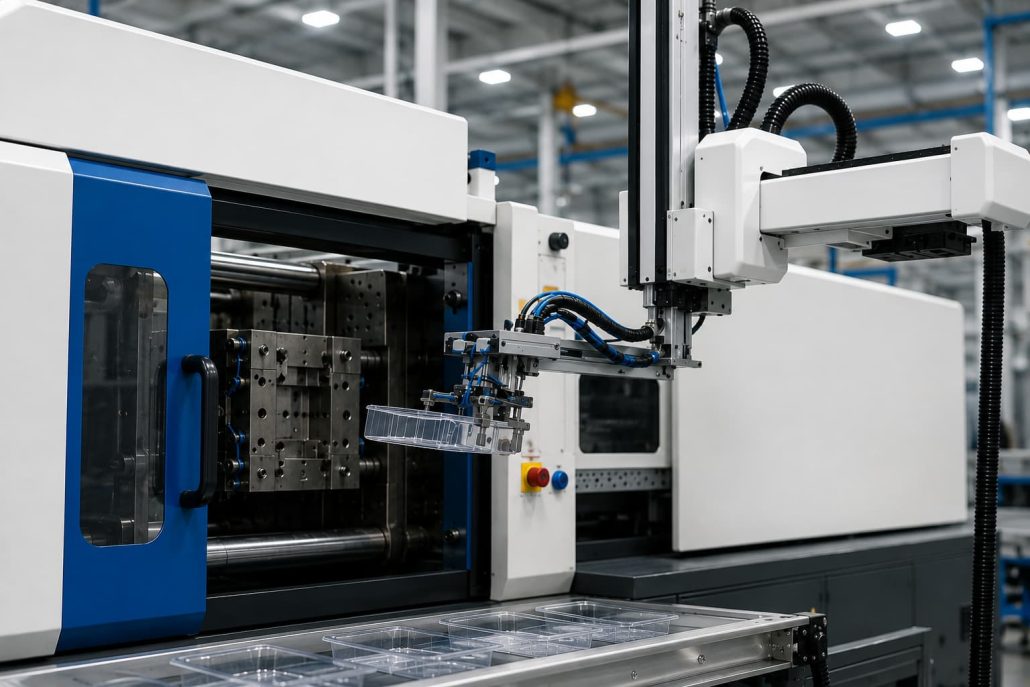
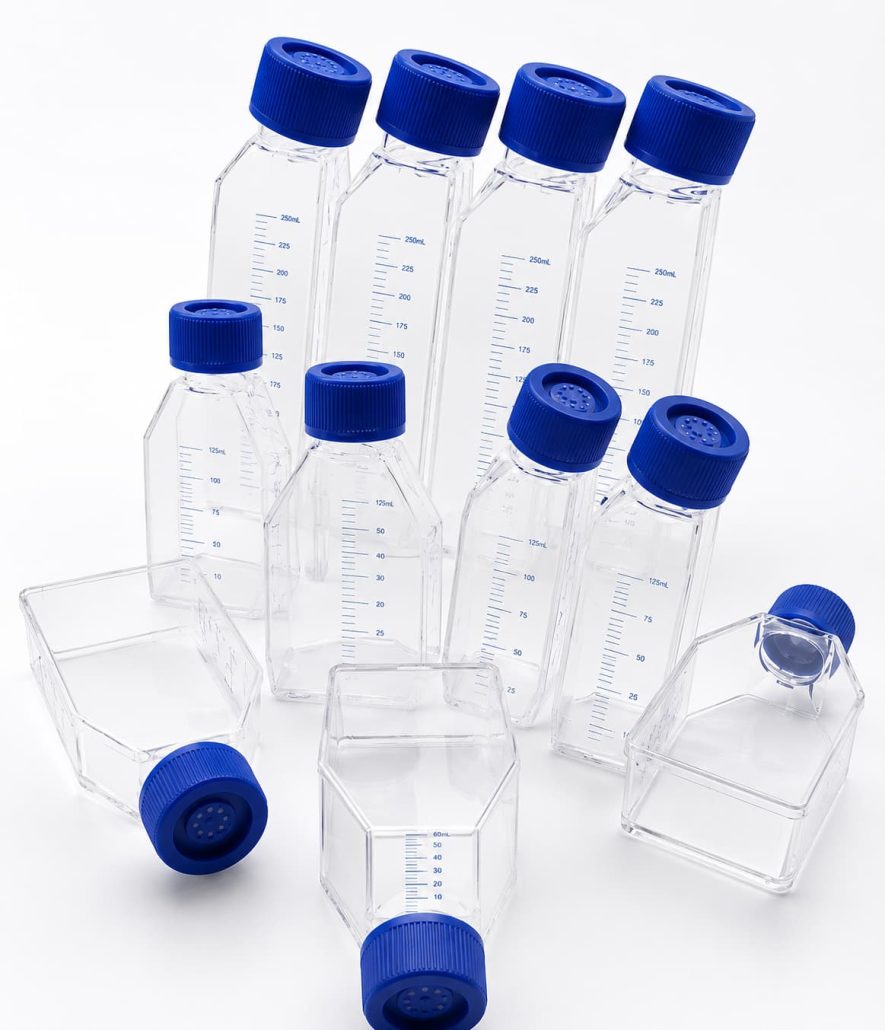
Cell culture flasks are widely used in biological research, pharmaceutical development, vaccine production, cell therapy, and laboratory cell culture. They provide a sterile environment for the growth and cultivation of adherent cells and are one of the most commonly used disposable laboratory consumables.
A qualified package of cell culture flasks typically contains 5 or 10 flasks sealed inside a plastic bag, depending on customer requirements. The most common flask sizes include:
- T25 (25 cm²)
- T75 (75 cm²)
- T175 (175 cm²)
- T225 (225 cm²)

A complete cell culture flask consists of two main components:
- Flask Body
- Cap Assembly
The cap is manufactured and assembled using a dedicated cap assembly machine. This process is not covered in this article. If you are interested, please refer to our other blog about Cell Culture Flask Cap Assembly Machines.
The flask body consists of an upper shell and a lower shell.
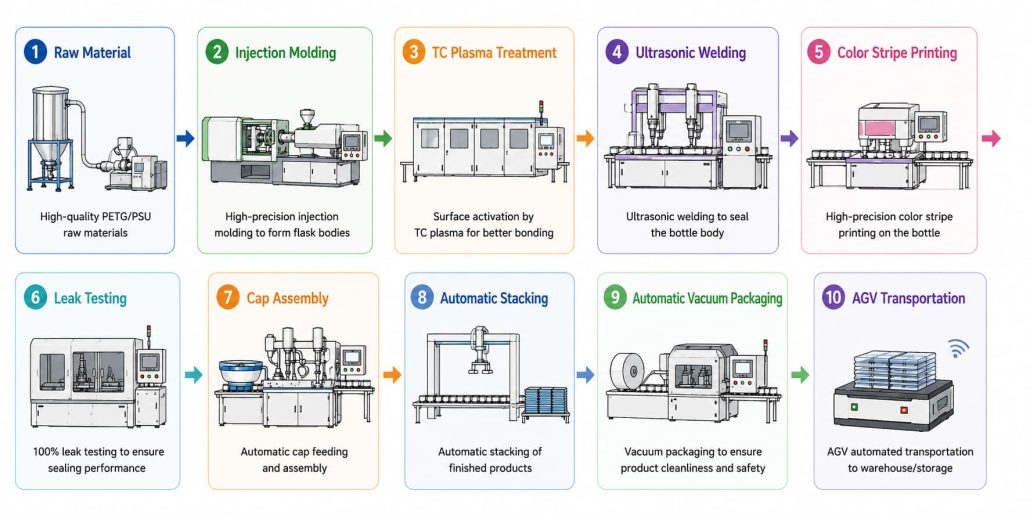
Step 1 – Injection Molding
The upper shell and lower shell of the cell culture flask are produced simultaneously in the same injection mold under cleanroom manufacturing conditions.
A typical mold is designed with two upper shells and two lower shells, allowing four parts to be molded in each injection cycle.
After molding, a robotic handling system automatically removes all molded parts from the mold in a single operation. The robot then separates the upper shells and lower shells and transfers them into two independent collection channels, preparing them for the subsequent ultrasonic welding process.
Because cell culture flasks are used for biological and pharmaceutical applications, the entire injection molding process is performed in a cleanroom environment to minimize particulate contamination and ensure the high cleanliness standards required for laboratory consumables.
Step 2 – Plasma Surface Treatment (TC Treatment)
After ultrasonic welding, the flask body undergoes Plasma Surface Treatment, also known as Tissue Culture (TC) Treatment, to modify the inner surface of the flask.
Most plastic materials, including polystyrene (PS), have naturally low surface energy, making them hydrophobic and limiting their ability to support cell attachment. In addition, low surface energy presents challenges for bonding, coating, and printing processes. Since durability, consistency, and product quality are essential in the medical device industry, effective surface treatment is a critical manufacturing step.
Plasma treatment modifies the chemical structure of the plastic surface by introducing polar functional groups, significantly increasing the surface energy and improving surface wettability. As a result, the treated surface becomes highly hydrophilic, allowing adherent cells to attach, spread, and proliferate more effectively.
Compared with untreated surfaces, plasma-treated flasks provide:
- Higher surface energy
- Improved wettability and hydrophilicity
- More uniform surface modification
- Enhanced cell attachment and growth
- Long-lasting surface stability
- Consistent cell culture performance
Atmospheric plasma technology also offers several advantages for medical device manufacturing:
- Uniform treatment of complex three-dimensional components
- Effective treatment of hard-to-reach internal surfaces
- Surface modification without affecting the bulk material properties
- Excellent process repeatability with high cost-effectiveness
- An environmentally friendly process without the use of chemical primers or solvents
Because the quality of TC Treatment directly influences cell adhesion and culture performance, it is considered one of the most critical processes in the manufacture of tissue culture-treated cell culture flasks.
This process is typically performed using atmospheric plasma systems, with TC Plasma Technology (Denmark) being one of the well-recognized suppliers in the industry

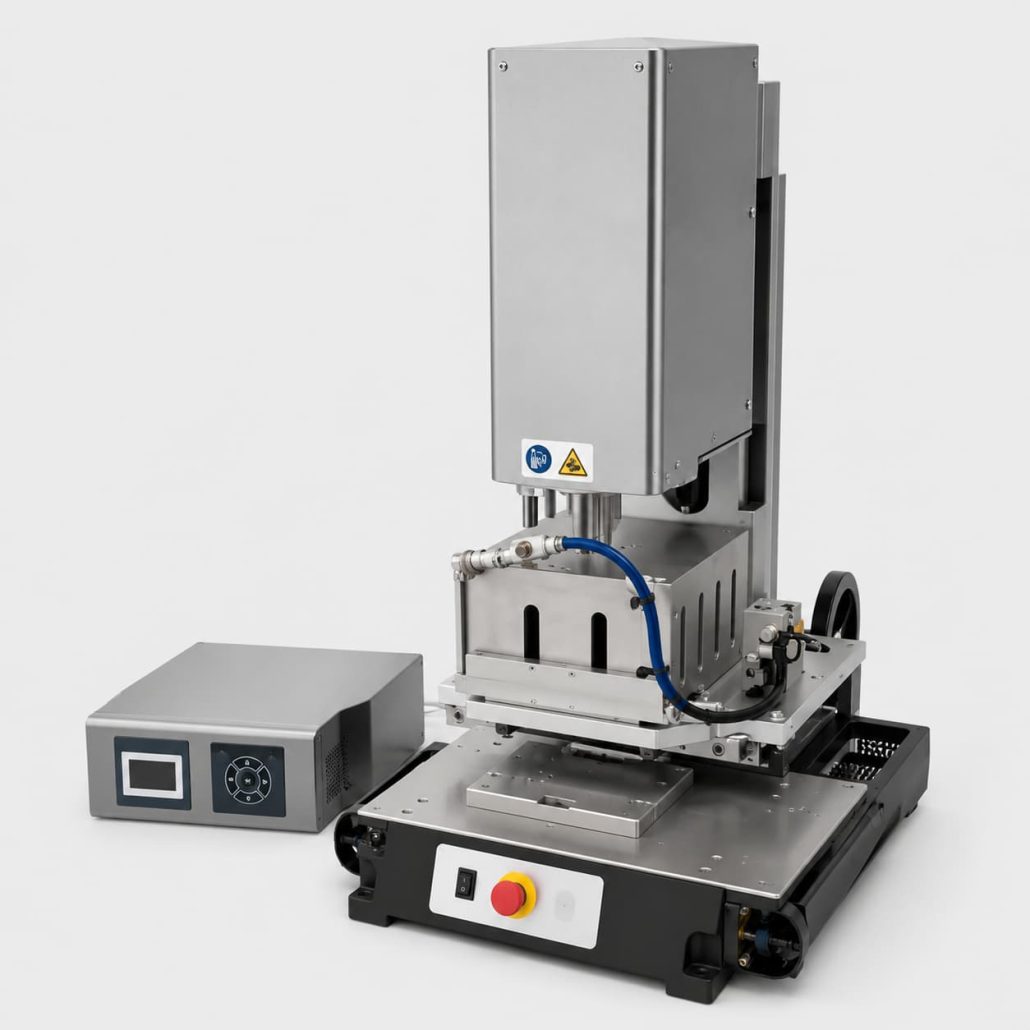
Step 3 – Ultrasonic Welding
A robotic handling system automatically transfers the upper and lower flask shells into the welding station for assembly.
The two plastic components are permanently joined using ultrasonic welding technology, creating a strong, reliable, and hermetic seal without the use of adhesives or solvents. This process ensures excellent dimensional consistency while minimizing the risk of particle contamination.
To maintain the high cleanliness standards required for cell culture products, the welding station is equipped with a dust extraction and particle removal system. During the welding process, any plastic dust or fine particles generated at the weld seam are immediately removed, preventing contamination of the flask interior and maintaining a clean production environment.
For cell culture flasks, ultrasonic welding is one of the most critical manufacturing processes. The quality of the weld directly affects the product’s sealing performance, structural strength, cleanliness, and overall reliability. A poorly controlled welding process may result in:
- Incomplete welds
- Air or liquid leakage
- Flash or excess plastic around the weld seam
- Part deformation
- Plastic particle contamination
- Reduced product consistency
- Higher reject rates during leak testing
For these reasons, selecting a high-quality ultrasonic welding system is essential. Advanced ultrasonic welding systems provide several important advantages:
- Precise Energy Control – Delivers accurate and consistent ultrasonic energy to every weld, ensuring stable welding quality.
- Excellent Process Repeatability – Maintains consistent welding performance throughout long production runs, reducing process variation.
- Hermetic Sealing – Produces airtight, leak-proof welds that meet the stringent requirements of laboratory and medical consumables.
- No Adhesives or Solvents – Creates clean, contamination-free joints without introducing additional materials into the product.
- Automation Ready – Easily integrates with robotic handling systems and fully automated production lines to maximize production efficiency.
- Suitable for Medical Device Manufacturing – Supports high-cleanliness production environments while meeting the demanding quality standards of the medical and life science industries.
Leading ultrasonic welding equipment manufacturers commonly used in the medical industry include:
- Dukane
- Herrmann
- Branson
These systems are well known for their stable ultrasonic output, precise process control, advanced digital monitoring, and outstanding welding repeatability. When combined with an efficient dust extraction system, they help manufacturers achieve clean welds, minimize particle contamination, improve leak-test pass rates, and ensure consistent product quality for high-volume cell culture flask production.
Step 4 – Color Stripe Printing
After plasma surface treatment, a colored identification stripe is printed on the flask body.
The purpose of this printing process is not to mark the production date, expiry date, or batch information. These date-related markings are typically adjusted and formed directly through the injection mold.
The printed color stripe is mainly used to distinguish different flask models, specifications, or product series. Different colors can be selected according to the customer’s identification requirements, making the products easier to recognize during production, packaging, storage, and use.
Step 5 – Leak Testing
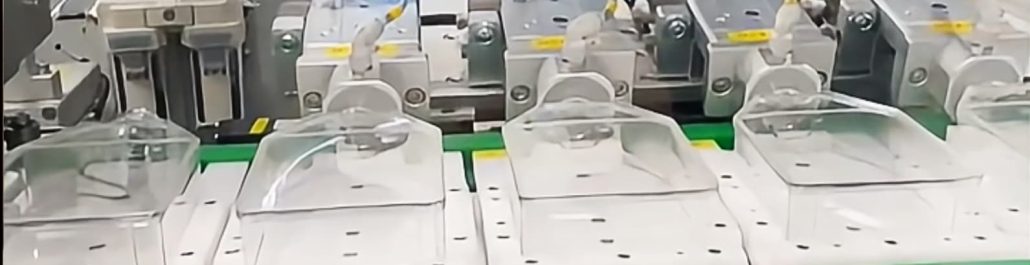
The welded flask bodies are transferred to the leak testing station to verify the integrity of the ultrasonic welds and ensure an airtight seal.
The leak testing machine can inspect two groups simultaneously (four flasks per cycle), significantly improving inspection efficiency. Any non-conforming flask is automatically detected, rejected, and separated from the production line, while only qualified products proceed to the next manufacturing process. This automatic rejection system reduces manual intervention, improves inspection reliability, and ensures stable product quality throughout the production process.
Step 6 – Flask and Cap Assembly
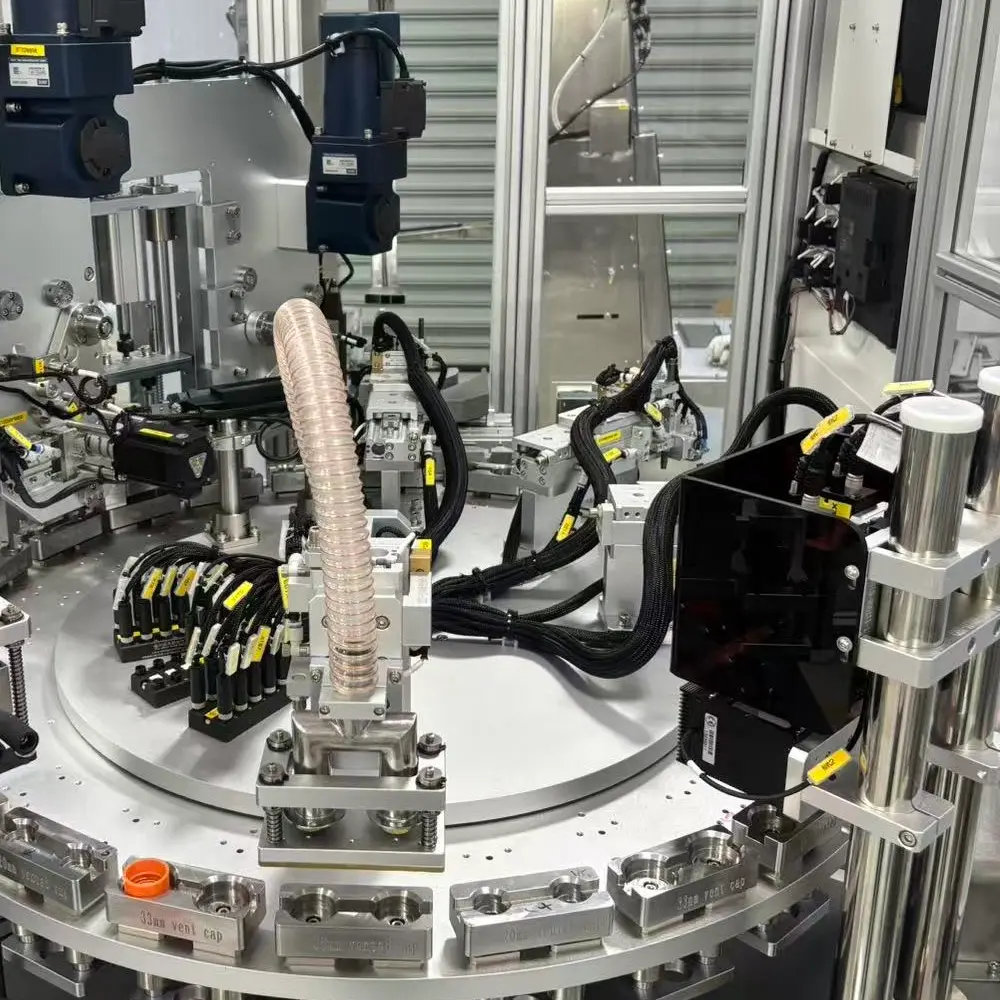
After the flask body has passed the leak test, it proceeds to the final assembly process, where the completed cap is assembled onto the flask body to produce the finished cell culture flask.
The cap itself can also be assembled using a dedicated Cap Assembly Machine, which automatically assembles the vent membrane (breathable membrane) with the cap. Depending on the customer’s production requirements, manufacturers can choose either:
- A dedicated cap assembly machine designed for a single flask size (such as T25, T75, T175, or T225), or
- A multi-size cap assembly machine capable of producing different cap specifications on a single machine through quick tooling changeover or recipe selection.
During the final flask and cap assembly process, assembly torque (or tightening force) is one of the most critical process parameters.
If the cap is assembled too tightly, users may experience excessive opening force during laboratory operation, reducing usability and potentially affecting the user experience.
If the cap is assembled too loosely, it may become detached during transportation, handling, or laboratory use, compromising product integrity and sterility.
For this reason, the assembly machine must precisely control the tightening force of every cap, ensuring consistent assembly quality while maintaining an optimal balance between sealing performance and ease of operation.
Step 7 – Automatic Stacking
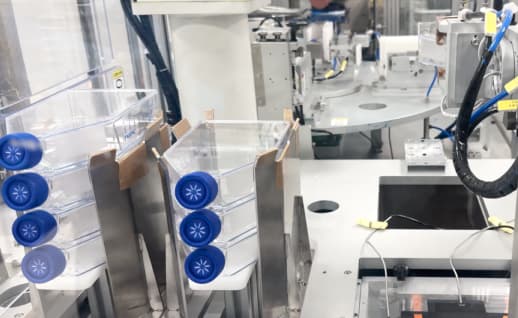
After the flask body and cap have been successfully assembled, the finished cell culture flasks are conveyed automatically to the stacking station.
According to the predefined packaging requirements, the flasks are automatically counted and collected into a dedicated stacking fixture. Typical packaging configurations include 5 flasks per stack or 10 flasks per stack, although the stacking quantity can be customized to meet different customer requirements.
The stacking fixture is specially designed to ensure that each flask is accurately positioned and neatly aligned, preventing movement or damage during the subsequent packaging process.
Step 8 – Automatic Vacuum Packaging
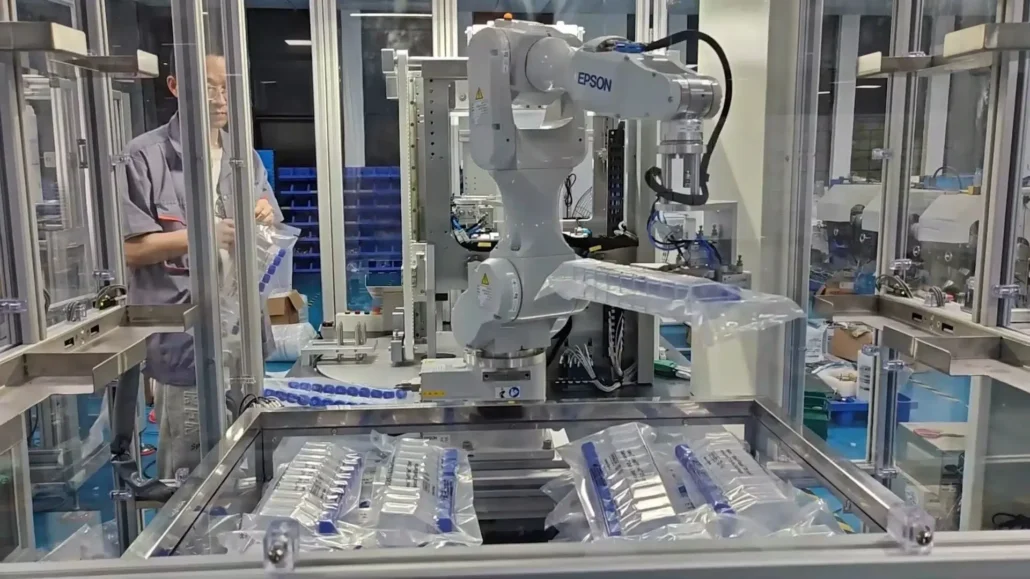
After the required number of flasks has been automatically stacked, the entire stack is transferred to the automatic packaging station.
A roll of medical-grade packaging film is automatically fed into the packaging machine, where the stacked flasks are accurately positioned and completely wrapped.
The packaging machine then automatically performs the following operations in a continuous production cycle:
- Automatic film feeding
- Flask wrapping
- Vacuum extraction
- Heat sealing
- Bag cutting
Vacuum packaging significantly reduces the overall package volume, allowing more products to be stored and transported within the same space. This not only improves warehouse utilization but also reduces transportation and logistics costs.
By removing excess air from the package, the stacked flasks remain securely positioned during transportation, minimizing movement caused by vibration or impact and reducing the risk of product damage.
The sealed package also provides effective protection against dust, moisture, and environmental contaminants, helping maintain product cleanliness and package integrity during storage and transportation.
To ensure consistent packaging quality, the machine precisely controls the film feeding length, vacuum level, sealing temperature, sealing pressure, sealing time, and bag cutting position, ensuring every package has a uniform appearance, reliable sealing performance, and consistent dimensions.
A stable and reliable automatic vacuum packaging system is essential for producing compact, clean, and high-quality packages that meet the stringent packaging requirements of the medical, pharmaceutical, and laboratory consumables industries.
Step 9 – AGV Transportation to Warehouse
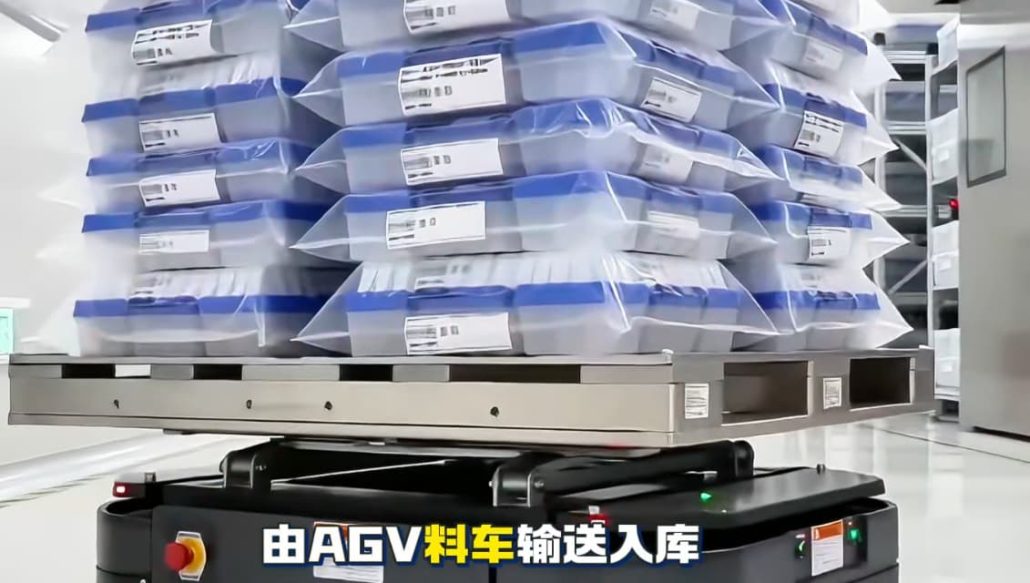
After the cell culture flasks have been vacuum packaged and sealed, the finished packages are automatically transferred to the warehouse by an Automated Guided Vehicle (AGV).
The AGV automatically collects the finished products from the packaging station and transports them to the designated storage area according to the warehouse management system (WMS) or production schedule, eliminating the need for manual material handling.
Compared with conventional forklift transportation, AGV-based logistics offers several advantages:
- Fully automated material transportation
- Reduced labor costs
- Improved production efficiency
- Lower risk of product damage during handling
- Real-time material traceability
- Seamless integration with MES and WMS systems
By integrating AGV transportation into the production line, manufacturers can achieve a fully automated workflow from injection molding to finished product warehousing, further improving factory automation, logistics efficiency, and intelligent manufacturing capabilities.